Quadruped Robot Update 1!
Since last summer, I've been wanting to start on a fairly ambitious project: building a quadruped robot that can walk and do cool static movements.
I didn't have much time to start back then as school was about to begin, but over winter break, I finally had time to truly start this thing. First, I decided to model everthing out in Fusion 360, a CAD tool that would allow me to 3d print the parts out later. I also began finding and buying parts for testing, including motors, bearings, buck converters, and some teensies with shields. By the end of the break, I had all of the mechanics figured out, and had been able to connect a teensy LC to a USB host 2.0 shield using this library . Now two weeks later, I've begun programming movement on one leg, specifically vertical translation of the foot. The foot stays directly underneath the shoulder joint with input from a ps3 controller!
Best of all, the math is really simple; It's all high school trigonometry!
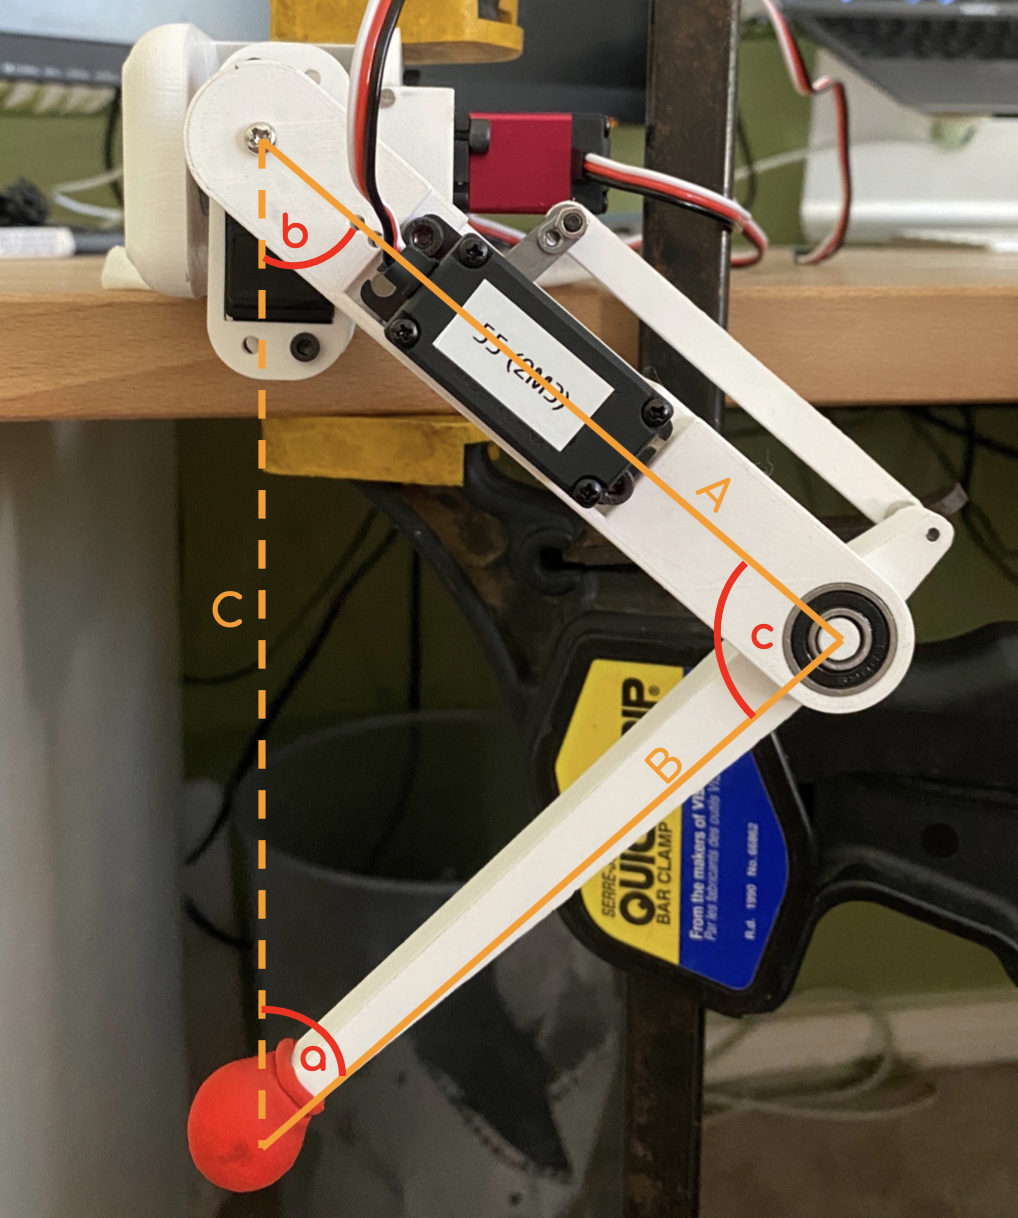
Here's the "diagram" I'm going to refer too:

The main idea is to use the law of cosines, which allows you to relate three angles of a triangle to one side: C2 = A2+B2 - 2ABcos(c). In this case, the goal is the move the foot vertically by inputing a demand length from the foot to the shoulder (in the diagram, length C). Since lengths A and length B are constant (the literal length of the parts), it is possible to calculate the angle c as long as a feasible demand C is provided. You simply need to rearrange the formula like this: c = cos-1( C2 - B2 - B2⁄-2AB ). After that, the math is easy; cunningly, A = B, so the triangle is isoscles. This makes a = b too, so you can solve for b by using the fact that angular sums of a triangle are 180˚. a = (180˚ - c)⁄2. After that, tell the motors to go to b and c, and you're done!
Here's most of the code that deals with this math:
1
2
3
4
5
6
7
8
9
10
11
12
13
14
15
16
17
18
19
20
21
22
23
24
25
26
27
28
29
30
31
32
33
34
void Kinematics::solveFtShldrLength(uint16_t controllerInput) {

  // Angles need to be mapped to motor zeros because servos don't turn 360 degrees
  if ((_legID == LEG_2) || (_legID == LEG_3)) {

    // Map controller input (0-255, 1 byte) to demand shoulder-foot length in cm
    uint16_t demandShoulderToFoot = map(controllerInput, 0, 1023, SHOULDER_FOOT_MIN, SHOULDER_FOOT_MAX);

    // Use the Law of Cosines to solve for the angles of motor 3 and convert to degrees
    double demandAngle3 = acos( ( pow(demandShoulderToFoot, 2) - pow(LIMB_2, 2) - pow(LIMB_3, 2) ) / (-2 * LIMB_2 * LIMB_3) );
    demandAngle3 = lrint( (demandAngle3 * 180) / PI);

    // Use demandAngle3 to calculate for demandAngle2 (angle for M2)
    double demandAngle2 = lrint( (180 - demandAngle3) / 2 );

    // Calculate final demand angles suited to motors
    demandAngle2 += M2_OFFSET;
    demandAngle3 = (M3_DEFAULT_ANGLE - demandAngle3) + M3_DEFAULT_ANGLE + M3_OFFSET;

    // Constrain motor angles and round the output to reduce noise
    demandAngle2 = _applyConstraints(2, demandAngle2);
    demandAngle3 = _applyConstraints(3, demandAngle3);

    // Set live motor angles to the newly calculated ones

    // motor 2:
    motor2.angleDegrees = demandAngle2;
    motor2.angleMicros = _degreesToMicros(motor2.angleDegrees, motor2.calibOffset);

    // motor 3:
    motor3.angleDegrees = demandAngle3;
    motor3.angleMicros = _degreesToMicros(motor3.angleDegrees, motor3.calibOffset);
  }
};
One of the things I'm most impressed with is the strength of this leg. The datasheet for these motors specified them to be 20kg-centimeters, and when I originally chose them, it was because they were easily accessible and I estimated each motor to be strong enough to lift length A and B (12.5 centimeters). This gives each motor a predicted strenght of 1.6kg at the end of the lever, however I assumed that a significant portion of this power would be lost due to the weight of other motors on a certain motor's lever arm. For example, the motor moving the entire leg in the left-right direction (refer to the diagram above) needs to carry another motor, which moves the leg in the up-down direction. When I was planning, I tried to reduce this effect by placing the motors as close together as possible. And it payed off: my leg can push on the ground with a strength of nearly 1.5kg!
Problems... so far:
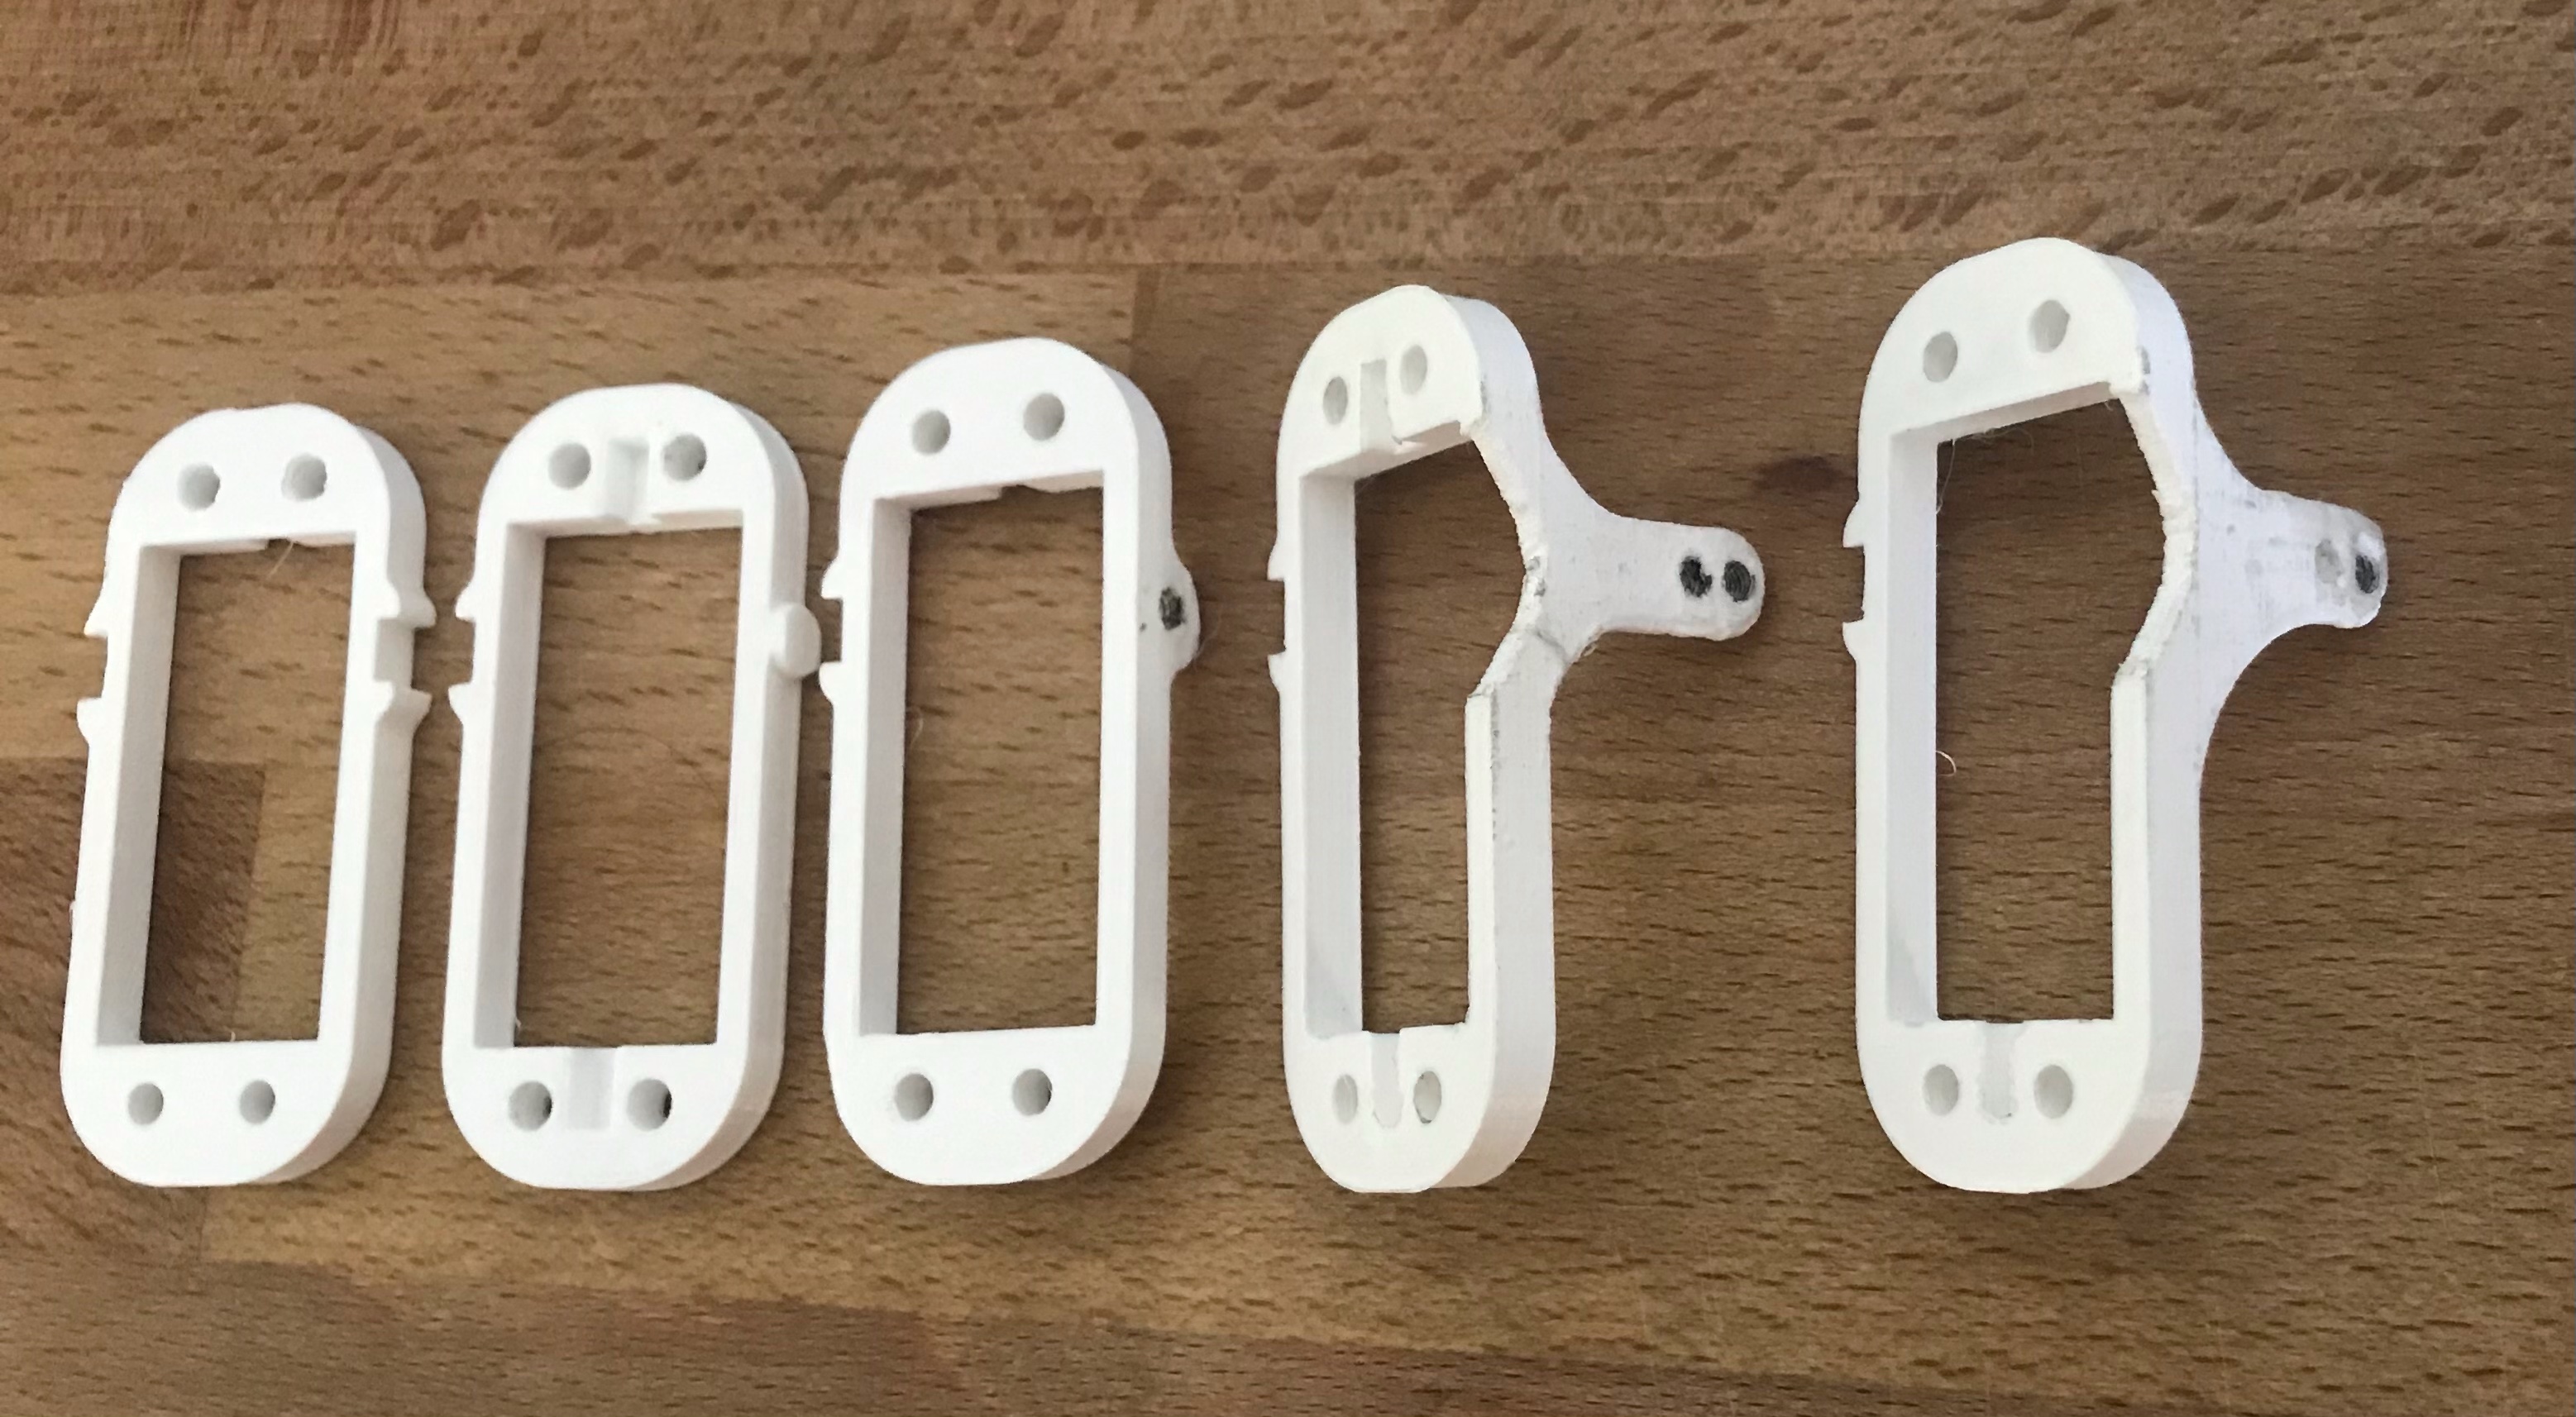
1: Parts keep breaking. More specifically, one part keeps breaking; the one that holds the x-axis motor (the motor that moves the entire leg horizontally, from the perspective of the diagram image earlier). If they don't break, they don't grip the motor axle; the motor turns, but nothing else happens.
Update: this problem is fixed! Only took me six iterations... (the sixth one is in the robot currently). Newer versions progress right.

2: The PS3/PS4 controller connection is bad. I've been connecting to the main microcontroller (teensy 4.1) from the controllers using this USB host 2.0 library and a mini USB 2.0 host shield. Right now, the library hasn't been updated to work with the teensy 4.1, so I've been running the usb host stuff on a teensy LC and communicating the data to the main teensy over I2C. At first I liked this, since the controllers are fun to use and the bluetooth connection was relatively stable. However, over time I found this to be clunky; intial setup was slow, a gazillion jumper cables plagued my desk, and long-term connectivity issues became worse. I've now decided to get rid of this all together, and possibly build my own controller with two LoRA radios. That will probably require a custom pcb, which may take me a while to finish (my AP chemistry final is two weeks away, and then the hardest unit in the class!).
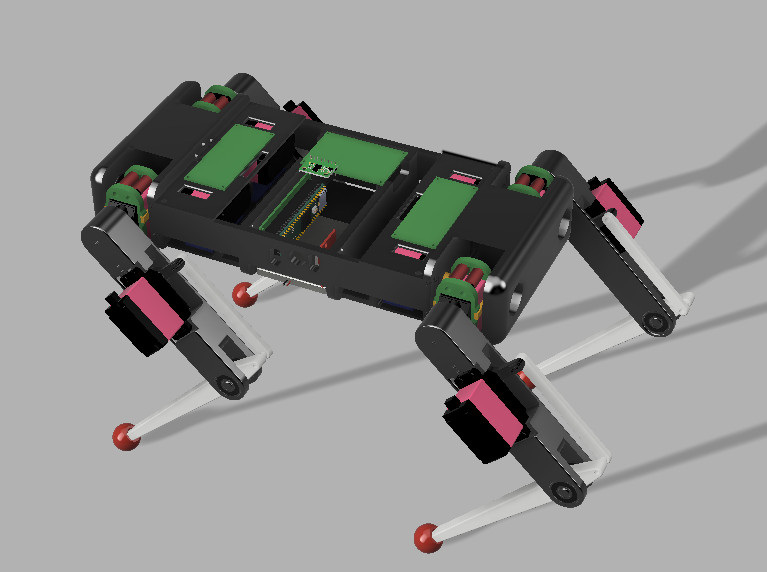
Here's another render of the robot from the back:
